Friday, August 20, 2010

Simply. Perfect. Bacon

I know of nothing on this earth that gives more pleasure in the realm of food than bacon. Not that overcooked, crumbly stuff. I'm talking thick, perfectly cooked, straight & flat bacon. Bacon like I once had at a quaint bed & breakfast inn over in Grass Valley. I almost couldn't eat it, it was so perfect. Almost. In the end, after oh, maybe 30 seconds of being in awe over the sheer perfectness of each slice, I gobbled it down.

Since that time, I have always searched, in vain, for a way to recreate that salted pork bliss. Today, I have found it. Bacon Nirvana.

You'll need bacon of course - preferably the thick cut stuff, peppered or regular. I had regular - a HUGE 5+ pound package of it. And I intend to cook all of it in this manner now that I've found the light.

The other key players here are:
Parchment Paper
Aluminum Foil
Two heavy duty rimmed baking trays - these need to be the same size, fairly heavy and they need to be able to nest inside each other. These are the same trays I use to make my Texas Sheet Cake and I've found I use them for SO many things!

First, preheat the oven to 400 degrees. While the oven is heating, line one of the baking trays with a good layer of foil, being sure to wrap it up around the edges - this does nothing to help with the cooking, but it just makes clean up easier. Next, lay down a couple of layers of parchment. This keeps the bacon from swimming in grease. Lay several slices of bacon in the tray, side by side but not touching.

Cover with a couple more pieces of parchment and another piece of foil - which will protect the top baking tray from getting all greasy. Then, nestle the other baking tray on top, pressing down slightly. Place it in the preheated oven and bake for 40-55 minutes - depending on how crisp you want your bacon.  If you used the thinly sliced bacon, start checking it after the first 15-20 minutes to make sure you don't incinerate it.

Make sure you drain off the grease between batches - otherwise your top pan will end up coated in the stuff. You may also have to swap out layers of parchment now & then, depending on how much bacon you're cooking.  The second tray helps in several ways - no spattering grease is the main reason, but it also ensures that the slices of bacon remain flat and straight and totally eliminates the curling factor.

When it comes out of the oven, it's perfect. Absolutely perfect. Remove from the pan and place on several layers of paper towels to absorb any lingering grease. If you cook large quantities of this (like I do) you can let it completely cool and store in a zip loc bag or airtight container in the freezer. 30 seconds or less in the microwave and they're ready to go!

Now, if you'll excuse me, I have more bacon to cook..... cause I just ate that whole pan.

Tuesday, August 10, 2010

PW's Risotto

When regular rice just won't do it for you.... Risotto is what will. Be prepared to devote at least a half hour to making this dish - as in don't answer the phone and if a kid gets an owie, someone else has to kiss & bandage it. Because of the heavy attention this dish required - constant stirring over the stove for the full duration of the cooking time I opted to use my little point & shoot Cannon Powershot.... taking pics with one hand is not really possible with my big Nikon... so the Cannon got some use today.  And, it also helps explain why the pictures aren't the best - taking a picture and stirring at the same time is not easy... I even forgot to stir a couple times!! Unfortunately, it also made for somewhat blurry pictures LOL... Oh well!

Here's the link to PW's recipe - I made half the volume and am glad I did. If I'd made the full recipe we'd be eating this for days. Not that it wasn't good, but a girl needs variety dangit!

The only real advice I can give you is this - make sure you have all your ingredients prepped (cut, measured etc) and set out, ready to go, before you start cooking. If you don't, you won't be able to. It took 25 minutes to reach the right doneness, and it really didn't start getting there till after the 20 minute mark.

Here we are, about 5 minutes in, after the addition of the second cup of chicken broth, and then so on down the line:

Until it was time to add the chives, oh man does this stuff smell delicious!

I had put some chicken thighs in the crock pot earlier - seasoned with only salt, pepper and some sprigs of lemon thyme. Right before I started cooking the risotto, I placed the chicken thighs in a 9x13 pan and placed them in the oven at 300 degrees, along with some brown bread. I did add some garlic salt to the chicken before placing it in the oven. 

The other thing I did was make some gravy from the juices in the crock pot - 2 tbsp butter melted in a pan, wisk in 2 tbsp flour & then strain the crock pot juices through a sieve. It made an awesome gravy for the chicken and required NO additional seasonings!

Serve it all up with a nice green salad... YUM

Monday, August 9, 2010

Teriyaki Pulled Pork

Sometimes I just run out of steam when it comes to thinking up stuff for dinner. Hey, it happens to the best of us now & then..... We had tacos last night so sloppy joes tonight was just too much ground beef too soon. I thought grilled chicken, but I had some Hawaiian Rice Balls left and wanted to make something that would go well with them. And then it came to me! Teriyaki Pulled Pork!!!  I keep pork carnita meat in the freezer on a regular basis because it's really a good, all-purpose pork to have around - plus, it's usually pretty cheap.

I got this stuff back in April when it was $1.48 a pound.  Don't worry if you have it frozen - you don't need to defrost it for this dish - let the crock pot do the work for you. You'll need to start with a "family size" package of meat - you could use beef or chicken too, but I opted for pork tonight.

Turn the crock pot on HIGH. It's ok, we're just warming it up until the meat can be placed in it. Now, remove the outer plastic wrap from the meat and place the whole thing, styro tray and all, in your sink and run cool water over it - this helps dislodge the meat from the styro tray.

Next, flip the meat over, remove the tray and adjust the water till it's barely warm. This will allow you to pull the plastic covered absorbing material off without it tearing and creating a HUGE mess.

Once you've removed that stuff, coat the meat with some salt & pepper on one side. Turn it over and place it in the crock pot and add salt & pepper to the other side of the meat. Don't worry that it sort of sticks up a little... less than 30 minutes in the crock pot & you'll be able to break it apart enough that it'll settle down to the bottom of the crock. Just remember to put the lid on it so the heat gets to it evenly.

Now, take a break - read a magazine, do a puzzle... or you can do what I did - water plants, pick tomatoes, take a picture of the sunflower boquet and try to fix the pepper grinder. I watered the garden plants that are in the bucket. While doing so I noticed quite a few of the orange tomatoes were ready to go as well as one of the little red "Patio" variety. After watering I picked these - don't they look great??? And the tiny orange ones are SO sweet!!! The red one was just over an inch in diameter - perfect bite sized tomatoes!

Here's the boquet... these just make me happy!

After that I tried to fix my pepper grinder. This is just one of those "disposable" ones from Costco... It got dropped and the top cracked inside... as a result we were getting a LOT of large chunks of pepper. That's all fine & well if you like to chew the peppercorns. However, there's a lot of food around here that needs a more powdery type of pepper so I decided to attempt to fix it. I took the top off and used Gorilla Glue to run a fine bead all around the post of the grinder. And by the way, I'm happy to report that the glue held and we're back to having appropriately sized ground pepper.

If you've never used Gorilla Glue, please, do yourself a favor and go get some. It comes in MANY different styles and you can find it in the paint section at Home Depot - at least that's where I found it last time. It's an AMAZING glue - the variety that I got doesn't dry quite as fast as Krazy Glue, but the holding power is so much better. I'm sure they even make a variety that's a quick dry like Krazy Glue.

After all of that, it had been less than 30 minutes and I was able to push the pork down in the crock pot. Oh - take a look at those cookie jars in the background.... I'll tell you about those another time.

Place the lid on and walk away... let it cook like this, on high, for several hours. If you're going to cook this while you're gone, cook it on low and leave it all day. If you're home, you can cook it on high and you can start it later in the day. I started it at noon.

Next, you can either ignore it and do the rest of the work later, OR you can do some prep work so that all you have left to do later is cook your side dishes. I opted to do some of my prep work early. For the rest of the pork dish, you'll need the following - Lawry's Teriyaki marinade, some pineapple and an onion.

This was a pretty large onion so I will only be using half of it. Cut the onion in half, removing any tough papery layers. Slice half of it lengthwise into strips. Now you can wrap up the other half and refrigerate it for later. I opted to dice it up and store it for use in other things... like breakfast burritos or my breakfast potatoes.

I try to keep some diced onion in the fridge all the time just for these type of things. Just cover & refrigerate the onions till later. Set aside the marinade and the pineapple for use later as well. In addition to the rice balls I decided to serve steamed broccoli and carrots with this.

Start by cutting some peeled carrots into about 3" lengths, then cut in half and then each half in quarters or thirds - basically, you want fairly even pieces so they cook at the same rate.

Next, take a head of broccoli and cut the florets down through the stem .

Place these in a bowl, and cover with plastic wrap and stick in the fridge for later.

About an hour after you first put the meat in the crock pot it should start smelling pretty good - Now is the time to break up all the individual pieces and move them around so the juices circulate.

Now go ahead and add the FULL bottle of the marinade. Don't worry about how much liquid there is, you want it all in there so it permeates the meat (and it'll pretty much all get soaked up in the end). At this point you can leave it for several hours - until about 30 minutes before you want to serve dinner - I planned to serve it around 6 tonight. I usually only move the pieces of meat around a few times during the cooking process, so that each piece gets equal time in the sauce.

About 30 minutes before you want to serve dinner, take a couple of forks and start pulling the chunks of meat apart, sort of shredding them up. Let the shredded, aka pulled, pork sit and simmer a little longer in the teriyaki sauces with the lid on the crock pot. If you taste it at this point it will seem quite salty - as if you OVER salted it. Don't worry. The sweetness of the Rice Balls will counteract the salty flavor of the pork and it'll end up being that perfect sweet & salty combination that we all (well nearly all) love.  Trust me on this one! But... if you still worry about salt content you can always salt it AFTER it's cooked completely, or not at all. I'm just sayin' you have options here.

Place the veggies in the steamer and set over high heat.

While those are cooking, add a tablespoon of butter along with a little olive oil to a saute pan.

When the butter is all melted, add the sliced up onions. Cook these until they're just starting to caramelize around the edges and are getting translucent.You want to make sure they're good & tender, but still have their shape & texture - the last thing you want is mushy onions...

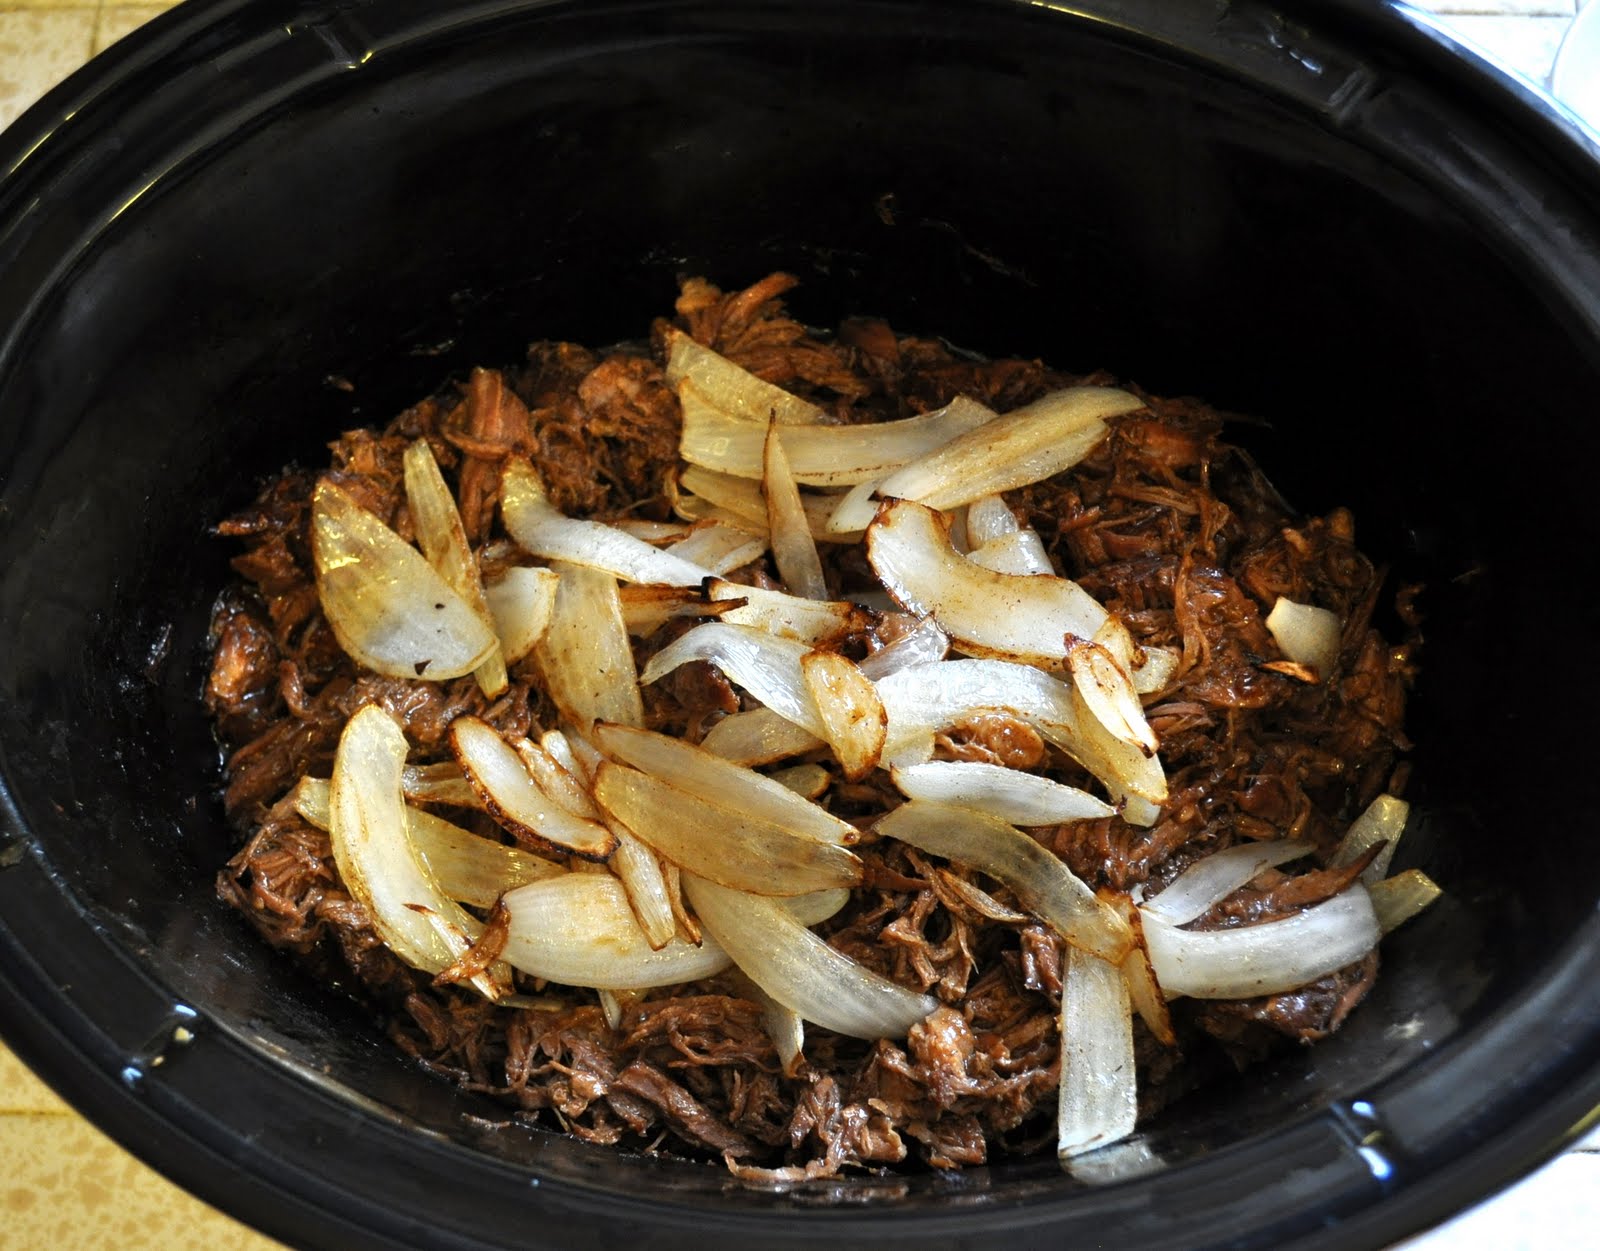
Add the onions to the pulled pork.

And mix it all up.

Now, you can add the pineapple at this point as well - OR, if you're not so keen on the pineapple, you can set it aside and let folks add it if they want it. I served it on the side because dad doesn't care for it that much and LD would eat it all given the opportunity.

Serve it up with the rice balls and the steamed veggies. YUM!!!

Thursday, August 5, 2010

Hawaiian Rice Balls

Oh yummmmmm.... I love rice... I love coconut... When my friend Sondra brought these to a party a couple years back I was instantly in love. They go great as a side dish to just about anything and are also a perfect snack. While you can eat them as soon as they're made, I recommend letting them chill in the refrigerator for several hours - they really firm up nicely and don't make such a mess that way.

You will need:
2 cups uncooked white rice - recipe calls for Calrose and I've found it really does work best
1 cup granulated sugar
1/2 tsp. salt
1/2 cup shredded coconut - you can use fresh or the packaged kind
Additional coconut to roll the rice balls in
Water to cook the rice, according to package directions

First - cook the rice - follow the directions and make sure that it's good & sticky when it's done - do NOT undercook this!!

Mix the rice, sugar, salt and 1/2 cup coconut together in a bowl - you can use a spoon to get it all mixed. I usually place the rice on top of everything else

Mix well, then bring out the potato masher to really "smush" it up - don't worry about breaking or crushing the rice grains - the starches released will help hold the balls together.

After it's well mixed, it'll look glossy. Allow it to cool well before handling - it doesn't have to be cold, but you don't want it warm to the touch - room temperature, or close to it - is just fine.  Form the rice into balls - I make them about the size of a golf ball, but you can make them whatever size you want - from a tennis ball down to a cherry tomato. Whatever floats your boat. Hint!!! You can NOT roll them into a ball - you have to sort of push them (form them) into the general shape. Trying to roll them just causes them to fall apart.

Next, roll them in more coconut.

Place in a dish or on a tray - Mine went into a 9x11 pan.

Cover with plastic wrap or a lid and refrigerate several hours or overnight. Best served cold.

I got 30 of these about the size of a golf ball from this recipe... I could have gotten probably 36 if I hadn't snacked on some and if I'd made them a bit more consistent in size. Oh well, it was worth it!

Oh... and just a word of caution - these are pretty messy to make - I had to make a point of NOT licking my fingers till I was completely done - almost more than I could take. I also try to use one hand and a spoon to press it together - that way you still have one clean(ish) hand to do things like turn on the water, answer the phone etc..... Or you can just ignore the phone like I do.